In my opinion there are four things, which made installing TFS such a complicated task:
1) Creation of users on Active Directory. The person installing TFS needs to create a number of account TFSSETUP, TFSSERVICE and TFSREPORTS and needs to know exactly what rights need to be given to this user in each tier.
2) Dependency of TFS on Windows SharePoint Services and SQL Server Reporting Services. These should be installed and configured before TFS could be set up.
3) TFS wizard does not separate installation of components and their configuration. If there is some problem in configuring any part of installation, the whole installation has to start from scratch.
4) TFS installation wizard does not “screen” the environment for installation, something that “TFS Best Practices Analyzer” does.
I think the point (2) is also very important in that if somebody wants to NOT use detailed reports from Reporting services or the team portal but just use TFS as a source repository (like Visual Source Safe) or source and bug repository, there wasn't another way for them unless they install everything.
Microsoft has addressed at least two of these issues in TFS 2010. The new version allows TFS to be installed completely and then there are wizards for configuring each area of TFS. Also, Microsoft SQL Server Reporting Services and SharePoint are now optional for TFS 2010.
Having read about it and to see how easy it is to install the Team Foundation Server, I thought to do a bare minimum single-server deployment of TFS2010. Following are the steps that I followed to deploy TFS2010
1) Created a new virtual machine taking an image of Windows 2008 service pack 1 as baseline.
2) Installed SQL Server 2008 on the my virtual machine.
- From the first step in SQL Server 2008 installation, I selected "New SQL Server stand-alone installation or add features to an existing installation".
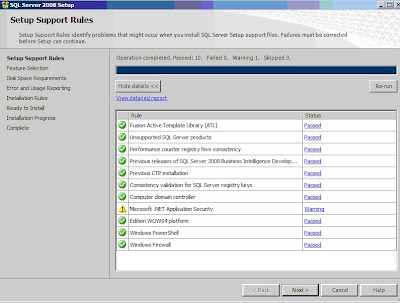
- Setup Support Rules ran and gave the following warning. I ignored it.
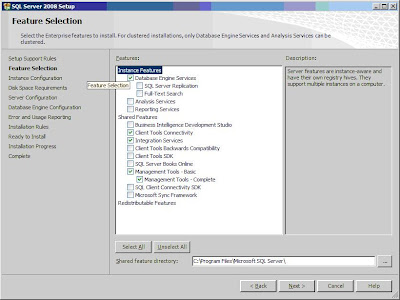
- Select following features for SQL Server 2008 installation
- Select default Instance
- Use NT_AUTHORITY\SYSTEM for all services
- Use Windows Authentication mode
- Use Administrator account for Database Engine configuration Account Provisioning and Analysis services configuration account provisioning.
- In the Reporting Services Configuration, select "Install the Native Mode default configuration"
3) So our third and last major step is to install TFS 2010 beta 1 on the server. I double clicked on the TFS setup file and is shown TFS installation wizard. In a couple of minutes with a couple of clicks, TFS is installed successfully and I am presented with the following configuration wizard.
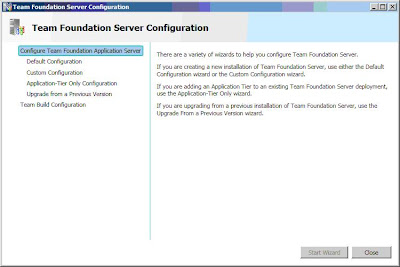 Knowing that the "Default Configuration" uses SharePoint and Reporting services, I decided to use Custom Custom configuration. So, I clicked on "Custom Configuration" and clicked "Start Wizard. The first step of Custom Configuration Wizard is shown
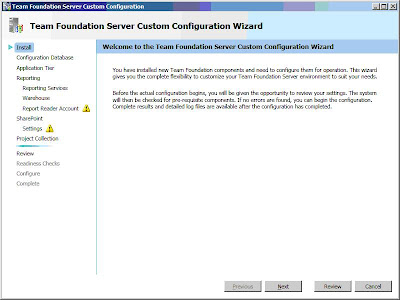 Clicked Next.
The second step "Configuration Database" asks for the name of SQL server instance and also if to use a pre-existing database.
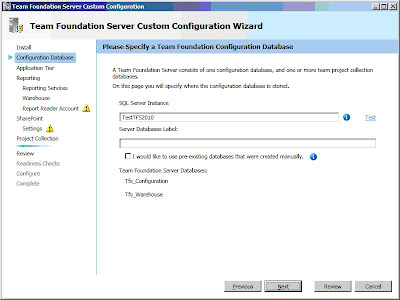
The wizard also allows to specify a label which would be included in the name of database. So if I give a label of "MYTFS" the Tfs_Configuration database would be changed to Tfs_MYTFS_Configuration
Click Next.
The next step is "Application Tier" asking about the account for TFS service and the website for TFS (whether to create a new one or to use an existing one).
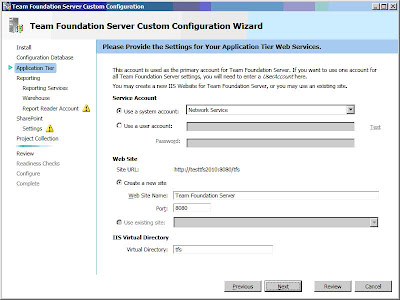
Leaving the defaults, I clicked Next
The next step goes on to configure "Reporting Services". It does tell that using reporting service is optional.
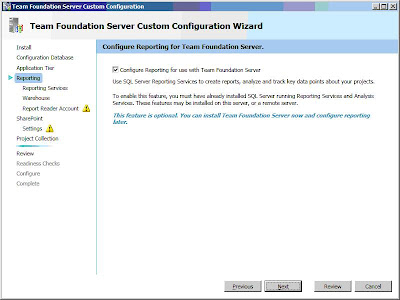 As I don't want to use Tfs Reporting so I simply unchecked the option and clicked next.
The next option is configure SharePoint.
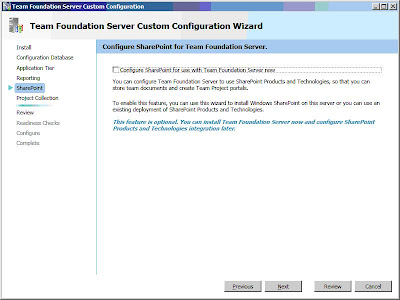 Again, it is an optional feature and I don't want to use it so I simple simply unchecked the option and clicked Next.
The next and last step asked whether I need to create a new Project Collection.
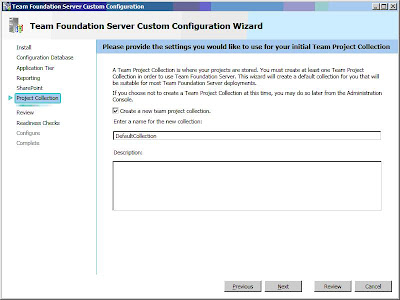
I did not want to create a new Project Collection, apart from the one created by default so just left the default options and click next.
The review screen is shown with a verify button (Something very similar to Best Practices Analyzer :))
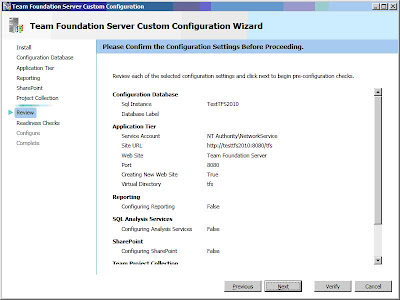
I clicked verify to see how is my installation looking and Ouch it came up with the following errors:
Error [ Configuration Database ] TF255149: The following server that is running SQL Server does not have the full-text search feature installed: TestTFS2010. This feature is required for Team Foundation Server to operate correctly. Error [ Configuration Database ] TF255152: Service is not running: SQL Server Database Agent Error [ Application Tier ] TF255120: Compatibility mode for Internet Information Services (IIS) 6.0 is not enabled. Team Foundation Server requires this mode on servers that are running Windows Server 2008. Error [ Application Tier ] TFxxxxxx: The Windows Authentication role service has not been installed in the Web Server (IIS) role. This role service is required for Team Foundation Server to function properly. Error [ Application Tier ] TF255151: Service is not installed: IIS Error [ Application Tier ] TF255151: Service is not installed: IIS Admin Service Warning [ System Checks ] TF255142: Windows Firewall is not enabled. Warning [ Configuration Database ] TF255153: Service is not set to start automatically: SQL Server Database Agent
Not ideal but at least I know what I need to do. So, I
- Started SQL Server Agent Service.
- Changed Start Mode of SQL Server Agent service from Manual to Automatic.
- Added Full-Text search feature to the existing installation of SQL Server 2008.
- From Administrative tools, select "Server Manager". Then from the "Roles", click "Add Role". Added following Roles to the server
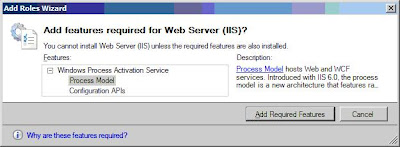
- Web Server (IIS) : Adding web server showed the following dialog that I cannot add Web server unless Windows Process Activation Service is installed
- Clicked Add Required Features and the dialog closes.
- I installed the following services to the web server role
- Common HTTP Features
- HTTP Logging
- Requrest Monitor
- Windows Authentication
- Request Filtering
- Static Content Compression
- IIS Management scripts and tools
- IIS6 Management Compatibility
- Clicked Next and it starts installing the Web Server role
Now that I have installed all the pre-requisites I tried to verify again. There's a "Click to Retry" link in the bottom, which retries all the tests. Clicked it and after about 5 minutes it showed me the following success message.
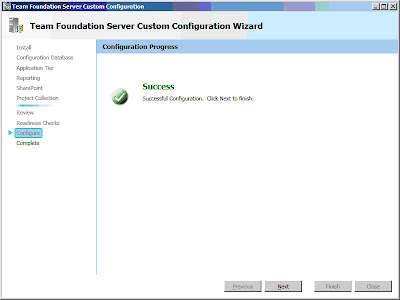
We are very close now and the whole thing is so much better than what we had in the older versions. Click Next and TFs setup is complete.
Now that TFS is all installed and configured, the next thing I wanted to do was to set up a Team Build. Team build can be on separate machines than TFS but I wanted to test it all in a single machine environment.
To configure team build, I clicked Team Build configuration from the Team Foundation Server configuration wizard and the clicked Start Wizard
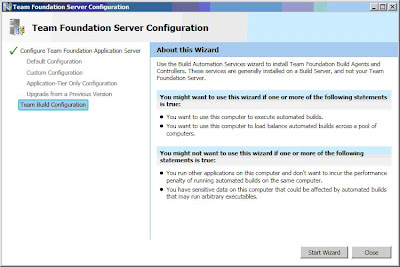
The first page of Team Foundation Build service is shown.
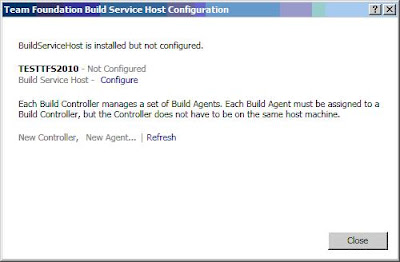
I clicked Configure and was presented with the following dialog
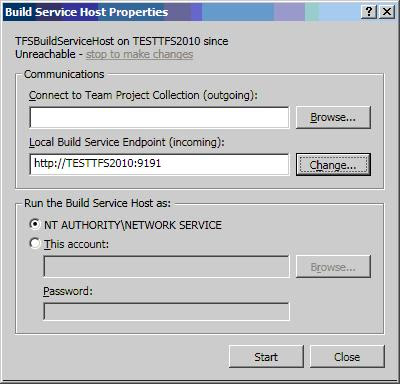
Since, there is no TFS server listed, I clicked on the Browse button and then clicked add.
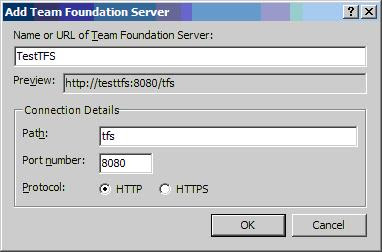
In the dialog, type in the name of my TFS server and then clicked OK.
In the connect to Team Project Collection, click Connect and then click start from the Build Service Host Properties and here you go. The Build Service Host has been configured.
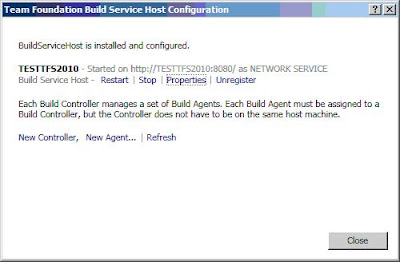
Click New Controller and it will create a new Controller service for you. The next and final step is to create a new Build Agent. Clik on New Agent. The following dialog is shown
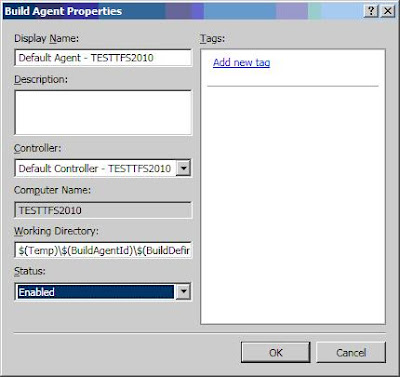
Type in a name for your agent, leave controller as default and change the status to Enabled and then click OK. And here you go, our build agent is now available for your build server.
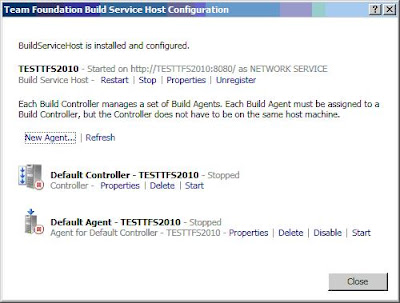
Now, we have successfully completed a a single server installation of TFS and created a build server. If you have worked with previous version, you would appreciate how easy it is as compared to it's predecessors.
In my next post, I will create a new team project and explore new features in the new version of TFS.
No comments:
Post a Comment